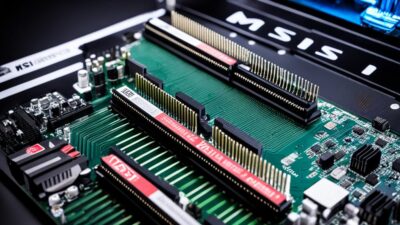
How to Enter BIOS on MSI Motherboard: Step-by-Step Instructions
Accessing the BIOS on your MSI motherboard is key for computer fans. It lets you tune boot settings, boost performance, or fix hardware troubles. We’ll guide you through getting into your MSI motherboard’s BIOS. This step-by-step guide will show you the ropes.
After reading, you’ll know how to tweak your BIOS settings. This will help boost your PC’s performance and keep it running smoothly. Let’s start our journey into MSI BIOS together!
Understanding the BIOS
Before we learn how to enter the BIOS on an MSI motherboard, let’s understand the BIOS itself. The BIOS stands for Basic Input/Output System. It’s a tiny software that controls the computer’s most basic functions. This includes starting up the computer and managing its parts.
What is the BIOS?
When you switch on your computer, the BIOS starts working first. It does many jobs, like making sure the computer can start, checking its parts, and letting you change settings. The BIOS is in a special spot on the motherboard. It’s like the heart of your computer, making sure everything works together the right way.
Why Accessing the BIOS is Important
Getting into the BIOS is key for a few reasons. It lets you set what your computer starts up with, turn parts on or off, and fix problems. You might go into the BIOS to choose to start from a USB or to control things like how secure your computer is.
Learning about the BIOS is important if you want to do more with your computer. By knowing how to use the BIOS, you can change many settings to better fit your needs. This way, you can make your computer work just the way you want.
Preparing to Enter the BIOS on MSI Motherboard
Before we start on accessing the BIOS on your MSI motherboard, having everything ready is key. Proper preparation ensures you can get to the BIOS smoothly.
First, check that your computer is fully on. It should not be in sleep or hibernation. This step is simple but makes sure your system is ready to respond in the right way.
Next, your keyboard needs to be good to go. Since you enter the BIOS with certain key presses, a working keyboard is a necessity. So, ensure your keyboard is plugged in and working.
- Ensure your computer is powered on and not in sleep or hibernation mode.
- Verify that your keyboard is properly connected and functioning.
Now you’ve got these steps in place, you’re set to start. With the right approach and remembering these steps, accessing your MSI motherboard’s BIOS will be easy. This lets you make changes or tweak settings as needed.
Keep in mind the BIOS is a powerful software that can help with many things. It lets you adjust settings, boost performance, and solve problems. Making sure to prepare well will lead to a great experience.
How to Enter BIOS on MSI Motherboard
Entering BIOS During Startup
To reach the BIOS on your MSI motherboard, press a specific key during the startup. It’s often the Delete or F2 key. But, the key you need might differ based on your PC. Look for the key info on screen when starting up. Then, press it quickly.
Entering BIOS from Windows
Alternatively, entering BIOS on your MSI motherboard is possible from Windows. You can do this by adjusting system settings or using a BIOS tool. Here are the steps for entering BIOS from Windows:
- Open the Start menu and search for “Settings”.
- Click on the “Update & Security” option.
- Select “Recovery” from the left-hand menu.
- Under the “Advanced startup” section, click on the “Restart now” button.
- Once your computer restarts, you’ll see the Advanced Startup Options menu. Pick “Troubleshoot”.
- Choose “UEFI Firmware Settings” and click “Restart”.
- This will make your computer boot into the BIOS. Here, you can adjust settings as needed.
Keep in mind, these steps might change a bit based on your Windows version. The basic idea, though, will stay the same.
| Method | Steps |
|---|---|
| Entering BIOS During Startup |
|
| Entering BIOS from Windows |
|
With these steps, you can easily get into the BIOS on your MSI motherboard. This works whether you’re starting up or already in Windows. Then, you can tweak settings for better computer performance.
Navigating the MSI BIOS Menu
Exploring the BIOS on your MSI motherboard is key to tweaking your computer’s performance. When you enter the BIOS successfully, you’ll see a menu. This menu lets you go through different settings and choices. We’re going to dive into understanding the navigating msi bios menu.
Familiarizing with the BIOS Layout
The BIOS menu on an MSI motherboard has different categories. Each includes its specific options. You’ll find categories like:
- System
- Overclocking
- Boot
- Security
- H/W Monitor
- Tool
- Save & Exit
Each category has a submenu. This helps you find and adjust specific settings. It’s designed to make the understand msi bios interface easier.
| BIOS Category | Key Functions |
|---|---|
| System | Includes basic system information, date/time settings, and power management options. |
| Overclocking | Allows you to tweak CPU, memory, and other hardware settings for improved performance. |
| Boot | Configures the boot order and options, such as fast boot and boot device priorities. |
| Security | Enables security features like supervisor and user passwords, and secure boot settings. |
| H/W Monitor | Displays real-time information about system temperatures, fan speeds, and voltages. |
| Tool | Provides access to advanced features like RAID configuration, system backup, and firmware updates. |
| Save & Exit | Allows you to save your BIOS settings and exit the interface, or discard changes and revert to default settings. |
Getting to know the msi bios layout and its categories will help you a lot. It lets you navigate the BIOS better and set up your system just right.
Common BIOS Settings to Adjust
If you own an MSI motherboard, there’s a lot you can do in the BIOS to boost your system’s power. We’ll look at how to set the boot order and tweak the performance settings. This way, we can make the most of what our machines can do.
Configuring Boot Options
On MSI motherboards, setting the boot order is key. It tells your system what to load first. You can pick if you want your system to start from a hard drive, SSD, or CD drive. This helps ensure your computer starts up smoothly. You can also adjust fast boot and secure boot, choices that impact how fast your computer starts and stays safe.
Overclocking and Performance Settings
Looking to get more power from your computer? The BIOS on MSI motherboards lets you overclock. You can make your CPU and memory run faster. Just be sure you watch out for issues like overheating and stability. The BIOS tools help you strike a balance between power and safety.
Exploring the common BIOS settings on MSI lets us tweak MSI BIOS boot options and MSI BIOS overclocking settings. This can unleash the total power of our MSI systems.
Saving and Exiting the BIOS
After changing BIOS settings on your MSI motherboard, you must save and exit correctly. This helps your new settings take effect. It’s vital for your computer to start up right. Let’s go through how to do this.
Saving BIOS Settings
Here’s how to keep your settings on an MSI motherboard:
- Head to the “Save & Exit” area in BIOS.
- Click on “Save Changes and Reset” to keep your current setup.
- You might see options like “Save Changes” or “Save as User Defaults.” These keep your settings for later.
Exiting the BIOS
After save your settings, it’s time to leave the BIOS. Here is what to do:
- Find and click the “Save & Exit” section in BIOS.
- Choose “Exit and Save Changes” to finish up. This saves your work and leaves the BIOS.
- Or, you can pick “Exit Discarding Changes” to not save your recent adjustments.
After you follow these steps, your computer will restart. Your new BIOS settings will be in place, making sure everything runs smoothly. Remember, getting out of the BIOS on your MSI motherboard the right way is key to your PC’s health and performance.
| BIOS Action | Steps to Follow |
|---|---|
| Saving BIOS Settings |
|
| Exiting the BIOS |
|
How to Enter BIOS on MSI Motherboard
Learning to access the BIOS on an MSI motherboard is important. It’s key for PC enthusiasts and technicians. It helps with setting boot preferences, overclocking, or fixing hardware problems. We’ll show you the simple steps to get into your MSI motherboard’s BIOS.
- Turn on your PC and wait for the MSI logo or boot screen.
- Press the correct BIOS access key right away. It’s often Delete or F2.
- Now you’re in the BIOS menu. Here, you can change settings as you need.
The key to enter BIOS might be different on your MSI model. If Delete or F2 doesn’t work, look in your motherboard’s manual. You can also find the info online at MSI’s website.
Once in the BIOS, you can tweak settings to make your system better. You can set boot preferences and check for any tech issues.
Knowing how to work with your MSI motherboard’s BIOS is very useful. This knowledge lets you control your PC’s hardware and software. Just follow these steps to get started on mastering your BIOS.
Troubleshooting BIOS Issues
Working with the BIOS on your MSI motherboard might bring some challenges. But we’re here to help! To start, get to know the common BIOS error codes to diagnose issues better.
Common BIOS Error Codes
Dealing with persistent BIOS issues means knowing the frequent error codes. These can range from hardware issues to config errors. Knowing these codes helps us take the right steps to fix the problem.
When you face BIOS issues with your MSI board, it’s about being a good problem-solver and keeping calm. With patience and the correct method, we’ll help your system work smoothly again. Look out for more tips to boost your BIOS skills!
FAQ
What is the BIOS?
The BIOS stands for Basic Input/Output System. It’s a computer’s firmware. This software controls the hardware when the computer starts.
It manages how the computer boots, sets up the hardware, and lets us change settings.
Why is accessing the BIOS important?
Getting into the BIOS lets us do several important things. We can change the order computers look for boot files. We can turn on or off hardware and fix problems.
This gives us a good understanding and control over our computers.
What should I have ready before entering the BIOS on an MSI motherboard?
Before trying to access the BIOS on a MSI motherboard, ensure your PC is on. Make sure it’s not in sleep or hibernation. You’ll need your keyboard to press specific keys.
How can I enter the BIOS on an MSI motherboard?
To get into the BIOS on an MSI motherboard, you have two options. You can do it right at the start or through Windows. If you want to enter at startup, press Delete or F2 early on.
Otherwise, you can adjust it in Windows using settings or a tool.
How can I navigate the MSI BIOS menu?
Once you’re in the BIOS, you’ll see a menu with different options. You’ll find categories like System and Overclocking among others. Take time to learn these settings.
What are some common BIOS settings that I can adjust?
In the MSI BIOS, there are many settings to improve your computer. You can change the boot order, turn on or off devices, and tweak performance settings. These can make your system work better.
How do I save and exit the BIOS on an MSI motherboard?
After changing settings, it’s key to save and exit the BIOS properly. This makes sure your settings take effect. Your computer should start up fine afterward.
What are some common BIOS error codes on an MSI motherboard?
If you face BIOS problems on an MSI motherboard, learn about common error codes. They can tell you what’s wrong. Then, you can fix the issue.
