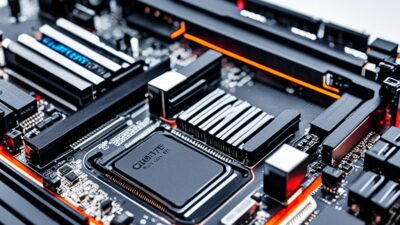
How to Update BIOS on Gigabyte Motherboard: Simple Steps
How to Update BIOS on Gigabyte Motherboard? We’re here to guide you through updating the BIOS on your Gigabyte motherboard. This process is not as complicated as it sounds.
By updating your BIOS, you get new features, better stability, and ensure everything works well with new hardware and software.
Updating the BIOS on your Gigabyte motherboard might feel overwhelming. But, don’t worry, we’ll show you how it’s done in a straightforward way.
Whether you want to boost your PC’s performance, solve any issues, or make sure you’re using the latest BIOS, this guide is for you. Let’s get started with updating your BIOS.
Introduction to BIOS Updates
The BIOS is like the heart of your computer, handling how the hardware and software talk. By updating your Gigabyte motherboard’s BIOS, you can get better performance, fix bugs, and use new hardware.
What is BIOS?
The BIOS is a type of software that kicks off your computer. It makes sure all the parts work together from the moment you turn it on. This software is key for a stable and efficient computer.
Why Update BIOS on Your Gigabyte Motherboard?
There are several good reasons to keep your Gigabyte motherboard’s BIOS up-to-date:
- It can make your computer run faster and smoother by adding new capabilities.
- It fixes known problems, making your computer more stable and reliable.
- Update to use the newest parts like CPUs, memory, and storage.
- It protects your system by adding security against threats.
Regular BIOS updates let your Gigabyte motherboard use its full power. Your computer stays up-to-date with new features and fixes. Next, we’ll show you how to update your BIOS step by step for the best results.
Preparing for the BIOS Update
Before updating your Gigabyte motherboard’s BIOS, back up the current version. This step ensures you can return to the original BIOS if needed. It’s a safety net for potential update problems.
Backing Up Your Current BIOS Version
Backing up your BIOS is simple but important. It can save you from headaches later. Follow these steps to back up your Gigabyte motherboard’s BIOS:
- Locate the BIOS backup utility from Gigabyte’s official website or your motherboard’s software suite.
- Use the utility to create a backup of your BIOS, following the instructions. This backup file is key if you need to go back.
- Save the backup file to a safe place, like a hard drive or USB flash drive. This ensures you can access it, even after changing motherboards or OS reinstalls.
By backing up your BIOS, you make your update process worry-free. It’s a simple step that could prevent big issues. You’ll be able to return to your old BIOS easily if any problems occur.
Backing up your BIOS is crucial before a BIOS update on your Gigabyte motherboard. It might take a little time, but it’s worth it. You’ll be glad if you face any update snags.
Downloading the Latest BIOS Update
Looking to update your Gigabyte motherboard’s BIOS? The first step is finding and downloading the latest BIOS version. It’s important to have the correct BIOS update for it to work right. We’ll show you how to get the newest BIOS update for your Gigabyte motherboard.
Start your search on Gigabyte’s website. There, you’ll find the most recent BIOS update for your specific Gigabyte motherboard model. Just head over to the Gigabyte website, go to the support section, and search for your motherboard’s model. After you find it, download the update file for your model.
Or, you can look for the BIOS update by using the model number of your Gigabyte motherboard if you already know it. Simply type your motherboard’s model number into Gigabyte’s search bar on their website. The right BIOS update file will show up.
Don’t know the specific model of your Gigabyte motherboard? Try searching for the latest BIOS update by your motherboard’s chipset. Gigabyte sorts BIOS updates by chipset, which makes it easier to find the right one.
After finding the correct BIOS update file, download it to your computer. This file is important for the next steps of updating your BIOS.
Creating a Bootable USB Drive
To update your Gigabyte motherboard’s BIOS, you’ll need to prepare a bootable USB drive. This involves formatting the drive and adding the BIOS update files. Then, your system can run the update from the USB.
Formatting the USB Drive
The first thing you need to do is format the USB drive to be bootable. Follow these steps:
- Insert the USB drive into your computer.
- Open the Disk Management tool on your Windows PC.
- Right-click on the USB drive and select “Format…”.
- In the Format window, choose “FAT32” as the file system. Ensure the Allocation unit size is the default.
- Click “OK” to start formatting.
Copying BIOS Update Files to USB
After formatting the USB drive, you must add the BIOS update files. Here’s what to do:
- Get the latest BIOS update from Gigabyte’s website for your motherboard.
- Unzip the downloaded BIOS update file to a folder on your PC.
- Move the BIOS update files to the main directory of the USB drive.
- Make sure the USB drive holds only these files and no others.
Your bootable USB drive is now set. You can advance to updating your Gigabyte motherboard’s BIOS.
How to Update BIOS on Gigabyte Motherboard
Are you ready to update the BIOS on your Gigabyte motherboard? We’ll show you how step by step. By following these steps, your BIOS update will go smoothly.
To start, turn on your computer. Then, press a specific key to enter the BIOS setup. It might be Delete, F2, or F12, depending on your motherboard. You can find the right key in your motherboard’s manual or on the screen when you start your computer.
- In the BIOS setup, find the “Update BIOS” or “BIOS Update” option. It could be in the “M.I.T.,” “Peripherals,” or “Tools” menu, depending on your BIOS type.
- Choose the “Update BIOS” option. Then, use your USB drive to find the BIOS update file.
- Follow the instructions on the screen to update the BIOS. Don’t turn off your computer during this process. Doing so could harm your motherboard.
Once the update finishes, your computer might restart on its own. Or, you may need to restart it. After it reboots, go back into the BIOS setup. Check to make sure the update was successful.
| Step | Action |
|---|---|
| 1 | Enter BIOS setup utility |
| 2 | Navigate to BIOS update option |
| 3 | Load BIOS update file from USB |
| 4 | Follow on-screen instructions |
| 5 | Verify successful BIOS update |
Keep in mind, the steps might be a bit different based on your motherboard model. Always check your motherboard’s manual for any specific directions. With the right guidance, updating the BIOS on your Gigabyte motherboard is easy. This ensures your system has the latest firmware and runs smoothly.
Entering the BIOS Setup Utility
To update the BIOS on your Gigabyte motherboard, you need to get into the BIOS setup. Press a key like Delete, F2, or F12 when your computer boots. The key you need varies with the motherboard model, so be sure to know yours.
Accessing BIOS Setup During Boot
Interested in tweaking your Gigabyte motherboard’s settings? Here’s how to get into the BIOS:
- Turn on or restart your computer.
- When it starts to boot, hit the right key (Delete, F2, or F12) over and over until you’re in the BIOS setup.
- In the BIOS, you can check out and adjust different settings.
Getting into the BIOS is key to start the accessing bios setup on gigabyte motherboard journey. In the BIOS setup, look for the update option to keep your system current.
If you’re not sure which key to press to enter bios on gigabyte, check the user manual or watch for hints on your screen while booting up. Knowing how to enter bios on gigabyte motherboard is crucial for a smooth update process.
Locating the BIOS Update Option
To update the BIOS on a Gigabyte motherboard, we need to first enter its setup utility. Each Gigabyte model may have a different path to this option. So, checking the motherboard’s manual or the manufacturer’s website is smart. This way, we get the best instructions for updating.
In the BIOS setup, we look for a specific option to update the BIOS. We do this by searching through its menu system. There, we might find a label like “Update BIOS” or “BIOS Update.” These options could be in different sections of the BIOS, such as “Main,” “Advanced,” “H/W Monitor,” or “Tools.”
When we find the right spot, we choose the option to update the BIOS. Selecting this may involve picking a file or an image. Or, we might just need to choose “Update BIOS” or “Flash BIOS” and then follow the prompts.
Every Gigabyte motherboard model has its own steps for updating the BIOS. That’s why we should check the manual or the website for our motherboard. This ensures we get the latest and most accurate information on updating BIOS for Gigabyte models. We can find tips for where to look, how to update and more this way.
Flashing the New BIOS Version
To begin, select the BIOS update option. You’re now ready to install the new BIOS on your Gigabyte motherboard. Follow the on-screen instructions closely to avoid any issues during the update.
Following On-Screen Instructions
Flashing the BIOS involves many steps to follow exactly. You’ll get a series of instructions on your screen. Here is what you should expect:
- Check that the BIOS update file is right for your Gigabyte motherboard.
- Agree to any warnings or disclaimers about updating the BIOS.
- Start the BIOS update using the key shown on the screen.
- Let the new BIOS write to the motherboard without turning off the computer.
- Avoid power cuts or turning off your system while updating.
- After update, your system might restart on its own or ask you to do it.
It’s really important to slow down and read the on-screen steps. Skipping or rushing through could make the BIOS update fail. This might cause trouble with your motherboard.
Stick to the on-screen guidance and keep your computer on. This way, you can update your Gigabyte motherboard’s BIOS without trouble. Then, you’ll enjoy the new features and fixes the update brings.
Troubleshooting BIOS Update Issues
Updating the BIOS on a Gigabyte motherboard is often easy. But, you might face errors while updating. We will go through some simple steps to fix these issues.
A common problem is a failed update. This can be due to many reasons. These include a sudden power cut, a bad USB drive, or using the wrong BIOS file. If your update fails, stay calm. There are steps to solve this issue.
- Check the BIOS update file: Make sure you have the right file for your Gigabyte motherboard. Check it against the recommended file from Gigabyte.
- Verify the USB drive: Ensure the USB drive is formatted correctly and the files are copied accurately. Consider trying another USB drive.
- Ensure stable power supply: A power loss during the update can cause failure. Have a reliable power source. Use a UPS to avoid any issues.
- Clear the CMOS: If the update fails, clearing the CMOS might help. Follow your motherboard’s manual to clear the CMOS.
Compatibility issues are also common. Ensure the BIOS file matches well with your specific Gigabyte motherboard. Using the wrong BIOS can harm your system.
If issues persist, Gigabyte’s technical support can help. They offer further troubleshooting steps and guidance for a successful update.
Verifying Successful BIOS Update
After updating the BIOS on your Gigabyte motherboard, it’s vital to check. We do this to make sure the update went well. This also means your system is now rocking the latest BIOS. It lets you confirm the successful update on your Gigabyte.
Checking BIOS Version After Update
To make sure the update worked, look at the BIOS version. Here’s how:
- Restart your computer and access the BIOS setup. You usually do this by pressing a key like “Delete” or “F2” when your computer starts.
- Inside the BIOS, find the section showing the current BIOS version. This is often under the “Main” or “System” tab.
- Check if this version matches the one you just updated. If it does, your update was successful.
But, if they don’t match, the update might not have finished right. In such a case, you might need to update the BIOS again. Or, get help from Gigabyte’s support to make sure everything’s good.
Verifying the BIOS version post-update ensures your Gigabyte motherboard is on point. It shows things are up-to-date and working without a hitch.
Best Practices for BIOS Updates
Updating your Gigabyte motherboard’s BIOS is key but must be done with great care. We’ve listed the best ways to update safely to prevent any problems. Stick to these tips to keep your system running smoothly while updating.
- Always back up your current BIOS version before attempting an update. If things go wrong, you can always return to your old BIOS. This keeps your system running without glitches.
- Carefully research the latest BIOS version for your Gigabyte model. Make sure it works with your system and fixes any issues you’ve seen. Pick the right update for a smooth process.
- Keep your computer connected to a stable power source as you update the BIOS. Losing power during this update could cause serious damage to your motherboard.
- Make a bootable USB drive just for this update, as the manufacturer suggests. Don’t use any other USB drives during this time to avoid any complications.
- Stick to the on-screen instructions from the update software. Don’t turn off your computer until it tells you the process is done and everything is okay.
- After the update, check the new BIOS version to ensure it worked. You can see this when your system starts up or by looking in the BIOS settings.
Using these steps for BIOS updates on Gigabyte motherboards will help you update safely. Just remember, be patient, read the instructions well, and back up your data. This lowers the chances of any update problems.
Conclusion
In this guide, we learned how to update the BIOS on a Gigabyte motherboard. Doing so helps unlock new features and improves stability. It also ensures your system works well with the newest hardware and software.
To update your BIOS, you need to get ready first. Then download the latest version and make a bootable USB. After that, you enter the BIOS setup, find the update option, and flash the new BIOS.
Approach BIOS updates with care, follow the steps closely, and be ready for any surprises. With the right steps, updating your BIOS will make your system better and more reliable.
FAQ
What is BIOS?
The BIOS is a key part of your computer. It links the hardware with the operating system. This link is vital for the computer to work right.
Why should we update the BIOS on our Gigabyte motherboard?
Updating the BIOS makes your motherboard work better. It can fix bugs and lets you use new hardware easier.
How do we back up the current BIOS version before the update?
Before updating, back up your current BIOS. This backup acts as a safety if the update goes wrong. It lets you go back to how things were.
Where can we find the latest BIOS update for our Gigabyte motherboard?
Find the newest BIOS update on Gigabyte’s website. Search for your motherboard model. Then download the right update file.
How do we create a bootable USB drive for the BIOS update?
Make a USB bootable by formatting it first. Then, put the BIOS update files on it. Make sure your computer can run the update from the USB.
How do we access the BIOS setup utility on our Gigabyte motherboard?
To get in the BIOS setup, press a key during system start. This key could be Delete, F2, or F12. It depends on your motherboard.
Where can we find the BIOS update option on our Gigabyte motherboard?
Inside the BIOS setup utility, find the update option. The location may change based on your motherboard type. Check the manual or website for guidance.
How do we flash the new BIOS version on our Gigabyte motherboard?
Choose the update option and “flash” the new BIOS. Follow the instructions on the screen. Be careful to avoid any issues during the update.
What should we do if we encounter issues during the BIOS update process?
Running into problems during the update? Always check the troubleshooting steps. They can help fix a lot of the common issues.
How can we verify that the BIOS update was successful?
After updating, check the BIOS version. This confirms if the update worked on your Gigabyte motherboard.
What are the best practices for updating the BIOS on a Gigabyte motherboard?
For a good experience, do some things before you update. Back up, make a USB bootable, and follow the prompts carefully.
